
Hamstrings
Hip hinges and knee-flexion patterns for the back of the thigh.
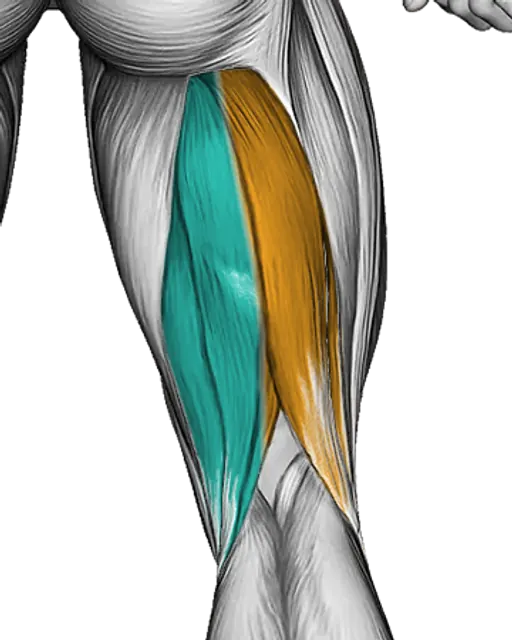
- Biceps femoris
- Semitendinosus
Exercises that train the Hamstrings
- Band DeadliftPrimary · Resistance band
- Band Standing Leg CurlPrimary · Resistance band
- Barbell DeadliftPrimary · Barbell
- Barbell Good MorningPrimary · Barbell
- Barbell Romanian DeadliftPrimary · Barbell
- Barbell Seated Good MorningPrimary · Barbell
- Barbell Single Leg DeadliftPrimary · Barbell
- Barbell Straight Leg DeadliftPrimary · Barbell
- Barbell Sumo Romanian DeadliftPrimary · Barbell
- Dumbbell Lying FemoralPrimary · Dumbbell
- Dumbbell Romanian DeadliftPrimary · Dumbbell
- Dumbbell Single Leg DeadliftPrimary · Dumbbell
- Dumbbell Single Leg Deadlift with Step Box SupportPrimary · Dumbbell
- Dumbbell Stiff Leg DeadliftPrimary · Dumbbell
- Glute Ham Raise (Version 2)Primary · Bodyweight
- Inverse Leg Curl with Bench PadsPrimary · Bodyweight
- Kettlebell DeadliftPrimary · Kettlebell
- Lever Kneeling Leg Curl (Plate Loaded)Primary · Machine
- Lever Lying Leg CurlPrimary · Machine
- Lever Lying Single Leg CurlPrimary · Machine
- Lever Seated Leg CurlPrimary · Machine
- Resistance Band Leg CurlPrimary · Resistance band
- Back Forward Leg SwingsSecondary · Bodyweight
- Balance Board (Version 2)Secondary · Bodyweight
- Band Bent Over Hip ExtensionSecondary · Resistance band
- Band Pull ThroughSecondary · Resistance band
- Band Standing Hip ExtensionSecondary · Resistance band
- Barbell Bench Front SquatSecondary · Barbell
- Barbell Bench SquatSecondary · Barbell
- Barbell Curtsey LungeSecondary · Barbell
- Barbell Front Rack Split SquatSecondary · Barbell
- Barbell Front SquatSecondary · Barbell
- Barbell Glute Bridge (Hands on Bar)Secondary · Barbell
- Barbell Hack SquatSecondary · Barbell
- Barbell Hip ThrustSecondary · Barbell
- Barbell Lateral LungeSecondary · Barbell
- Barbell LungeSecondary · Barbell
- Barbell Narrow Stance SquatSecondary · Barbell
- Barbell Power JerkSecondary · Barbell
- Barbell Rear LungeSecondary · Barbell
- Barbell Single Leg Split SquatSecondary · Barbell
- Barbell Split SquatSecondary · Barbell
- Barbell Split Squat (Version 2)Secondary · Barbell
- Barbell Step UpSecondary · Barbell
- Barbell Sumo DeadliftSecondary · Barbell
- Barbell Wide SquatSecondary · Barbell
- Bent Knee Back to Side KickSecondary · Bodyweight
- Bent Leg Kickback (Kneeling)Secondary · Bodyweight
- Bent Leg Side Kick (Kneeling)Secondary · Bodyweight
- Bird DogSecondary · Bodyweight
- Bodyweight Pulse SquatSecondary · Bodyweight
- Bridge Hip AbductionSecondary · Bodyweight
- Cable DeadliftSecondary · Cable
- Curtsey SquatSecondary · Bodyweight
- Dumbbell Bar Grip Sumo SquatSecondary · Dumbbell
- Dumbbell Bench SquatSecondary · Dumbbell
- Dumbbell Curtsey LungeSecondary · Dumbbell
- Dumbbell DeadliftSecondary · Dumbbell
- Dumbbell Front SquatSecondary · Dumbbell
- Dumbbell Glute BridgeSecondary · Dumbbell
- Dumbbell Goblet Split Squat Front Foot ElevantedSecondary · Dumbbell
- Dumbbell Goblet SquatSecondary · Dumbbell
- Dumbbell LungeSecondary · Dumbbell
- Dumbbell Rear LungeSecondary · Dumbbell
- Dumbbell Side Lunge (Version 3)Secondary · Dumbbell
- Dumbbell Single Leg Glute BridgeSecondary · Dumbbell
- Dumbbell Single Leg SquatSecondary · Dumbbell
- Dumbbell Single Leg Squat (Version 2)Secondary · Dumbbell
- Dumbbell Split SquatSecondary · Dumbbell
- Dumbbell Split Squat Front Foot ElevantedSecondary · Dumbbell
- Dumbbell SquatSecondary · Dumbbell
- Dumbbell Step UpSecondary · Dumbbell
- Dumbbell Step Up LungeSecondary · Dumbbell
- Dumbbell Step Up Split SquatSecondary · Dumbbell
- Dumbbell Sumo DeadliftSecondary · Dumbbell
- Dumbbell Sumo Pull ThroughSecondary · Dumbbell
- Dumbbell Sumo SquatSecondary · Dumbbell
- Dumbbell SupermanSecondary · Dumbbell
- Dumbbell Supported SquatSecondary · Dumbbell
- Dumbbell SwingSecondary · Dumbbell
- Exercise Ball One Legged Diagonal Kick Hamstring CurlSecondary · Bodyweight
- Floor T RaiseSecondary · Bodyweight
- Flutter Kicks (Version 2)Secondary · Bodyweight
- Frog Reverse Hyperextension (on a Bench)Secondary · Bodyweight
- Front Plank with Leg LiftSecondary · Bodyweight
- Glute Bridge MarchSecondary · Bodyweight
- Glute Bridge Two Legs on BenchSecondary · Bodyweight
- Hip SwirlsSecondary · Bodyweight
- Hip ThrustsSecondary · Bodyweight
- HyperextensionSecondary · Bodyweight
- Kettlebell Forward LungeSecondary · Kettlebell
- Kettlebell Front SquatSecondary · Kettlebell
- Kettlebell Goblet SquatSecondary · Kettlebell
- Kettlebell Lunge Pass ThroughSecondary · Kettlebell
- Kettlebell Side LungeSecondary · Kettlebell
- Kettlebell Split SquatSecondary · Kettlebell
- Kettlebell SwingSecondary · Kettlebell
- Kettlebell ThrusterSecondary · Kettlebell
- Kicks Leg BentSecondary · Bodyweight
- Kneeling Leg Half CircleSecondary · Bodyweight
- Kneeling Side Leg to KickSecondary · Bodyweight
- Landmine Squat and PressSecondary · Machine
- Lateral Step UpSecondary · Bodyweight
- Leg Over Knee Glute BridgeSecondary · Bodyweight
- Lever Back ExtensionSecondary · Machine
- Lever Back Extension (Version 2)Secondary · Machine
- Lever Belt Bulgarian Split SquatSecondary · Machine
- Lever Belt SquatSecondary · Machine
- Lever Belt Sumo SquatSecondary · Machine
- Lever Deadlift (Plate Loaded)Secondary · Machine
- Lever Hip Thrust (Plate Loaded)Secondary · Machine
- Lever Horizontal Leg PressSecondary · Machine
- Lever Horizontal One Leg PressSecondary · Machine
- Lever Pendulum Squat (Plate Loaded)Secondary · Machine
- Lever Reverse Hyperextension (Plate Loaded)Secondary · Machine
- Lever Reverse Vertical Hack SquatSecondary · Machine
- Lever Seated Leg PressSecondary · Machine
- Lever Squat (Plate Loaded)Secondary · Machine
- Low Glute Bridge on FloorSecondary · Bodyweight
- Lying Alternate Frog KickSecondary · Bodyweight
- Lying Alternate Toe Touch FloorSecondary · Bodyweight
- Lying Back ExtensionSecondary · Bodyweight
- Lying Back Extension with PressSecondary · Bodyweight
- Lying Frog KickSecondary · Bodyweight
- Lying Hyperextension HoldSecondary · Bodyweight
- Pelvic TiltSecondary · Bodyweight
- Pistol Squat to BoxSecondary · Bodyweight
- Potty Squat with SupportSecondary · Bodyweight
- Power Sled Rear LungeSecondary · Machine
- Resistance Band ClamSecondary · Resistance band
- Resistance Band Glute BridgeSecondary · Resistance band
- Resistance Band Hip Thrusts on KneesSecondary · Resistance band
- Resistance Band Leg KickbackSecondary · Resistance band
- Resistance Band One Leg Glute BridgeSecondary · Resistance band
- Resistance Band One Leg Kickback (Bent Position)Secondary · Resistance band
- Resistance Band Plank MarchSecondary · Resistance band
- Resistance Band SquatSecondary · Resistance band
- Side Bridge with Bent LegSecondary · Bodyweight
- Side LungeSecondary · Bodyweight
- Side to Side Leg SwingsSecondary · Bodyweight
- Single Leg Hip Bridge (Straight Leg)Secondary · Bodyweight
- Sit (Wall)Secondary · Bodyweight
- Sled 45 Degrees One Leg PressSecondary · Machine
- Sled Full Hack SquatSecondary · Machine
- Sled Hack SquatSecondary · Machine
- Smith Chair SquatSecondary · Machine
- Smith DeadliftSecondary · Machine
- Smith Front Squat (Clean Grip)Secondary · Machine
- Smith Hip ThrustSecondary · Machine
- Smith Leg PressSecondary · Machine
- Smith Rear Lunge (Version 2)Secondary · Machine
- Smith Single Leg Split SquatSecondary · Machine
- Smith Sumo DeadliftSecondary · Machine
- Smith Sumo SquatSecondary · Machine
- Smith Toe RaiseSecondary · Machine
- SquatSecondary · Bodyweight
- Squat on BOSU BallSecondary · Bodyweight
- Straight Leg Kickback (Kneeling)Secondary · Bodyweight
- Sumo SquatSecondary · Bodyweight
- SupermanSecondary · Bodyweight
- Swimmer Kicks (Version 2)Secondary · Bodyweight
- Table Top BridgeSecondary · Bodyweight
- Hamstring StretchPrimary · Bodyweight
- Lying Leg Tuck Hip StretchPrimary · Bodyweight
- Roll Hamstrings and Glute Sitting on FloorPrimary · Bodyweight
- Roll Hamstrings Sitting on FloorPrimary · Bodyweight
- Roll Peroneal (Single Leg) Side Lying on FloorPrimary · Bodyweight
- Roll Tibialis Anterior (Single Leg) Lying on FloorPrimary · Bodyweight
- Single Straight Leg StretchPrimary · Bodyweight
- Bridge Pose Setu BandhasanaSecondary · Bodyweight
- Calf Stretch with RopeSecondary · Bodyweight
- Calves StretchSecondary · Bodyweight
- Cobra Yoga PoseSecondary · Bodyweight
- Downward Facing DogSecondary · Bodyweight
- Dynamic Back StretchSecondary · Bodyweight
- Flexion and Extension Hip StretchSecondary · Bodyweight
- Hip Extension StretchSecondary · Bodyweight
- Intermediate Hip Flexor and Quad StretchSecondary · Bodyweight
- JackknifeSecondary · Bodyweight
- Low LungeSecondary · Bodyweight
- Low Lunge (Left)Secondary · Bodyweight
- Peroneals StretchSecondary · Bodyweight
- Pigeon Hip StretchSecondary · Bodyweight
- Plyo Side Lunge StretchSecondary · Bodyweight
- Quadriceps Lying StretchSecondary · Bodyweight
- Quadriceps StretchSecondary · Bodyweight
- Roll CalvesSecondary · Bodyweight
- Roll Calves (Single Leg)Secondary · Bodyweight
- Roll Erector Spinae Lying on FloorSecondary · Bodyweight
- Roll FootSecondary · Bodyweight
- Roll Glute Twist Lying on FloorSecondary · Bodyweight
- Roll Glutes Sitting on FloorSecondary · Bodyweight
- Roll Pigeon StretchSecondary · Bodyweight
- Roll Quadriceps (Vastus Lateralis) Lying on FloorSecondary · Bodyweight
- Roll Rectus FemorisSecondary · Bodyweight
- Runners StretchSecondary · Bodyweight
- Seated Wide Angle Pose SequenceSecondary · Bodyweight
- Slopes Towards StretchSecondary · Bodyweight
- Spine Stretch ForwardSecondary · Bodyweight
- Standing Knee to Chest StretchSecondary · Bodyweight
- Standing Pelvic TiltSecondary · Bodyweight
- Standing Quadriceps StretchSecondary · Bodyweight
- Static Position Lying Back with PadSecondary · Bodyweight
- Static Position Lying FrontSecondary · Bodyweight
- Static Position Seated BackSecondary · Bodyweight
- Static Position Seated Back with PadSecondary · Bodyweight
- Static Position StandingSecondary · Bodyweight
- Barbell Squat Jump Step Rear LungeSecondary · Barbell
- Bodyweight SkippingSecondary · Bodyweight
- Briskly WalkingSecondary · Bodyweight
- Elliptical Machine WalkSecondary · Machine
- High Knee Jump RopeSecondary · Bodyweight
- High Knee SquatSecondary · Bodyweight
- High Knee Squat (Version 2)Secondary · Bodyweight
- Jump RopeSecondary · Bodyweight
- Jump SquatSecondary · Bodyweight
- Jump Step UpSecondary · Bodyweight
- Resistance Band Lateral WalkSecondary · Resistance band
- Resistance Band WalkSecondary · Resistance band
- SkaterSecondary · Bodyweight
- Walk Elliptical Cross TrainerSecondary · Machine
- Walk Wave MachineSecondary · Machine
- WalkingSecondary · Bodyweight
- Walking LungeSecondary · Bodyweight
- Walking on Incline TreadmillSecondary · Machine
- Walking on StepmillSecondary · Machine
- Walking on TreadmillSecondary · Machine
How to train it
Train the Hamstrings with 2–4 of the movements above. Cover different angles, use 2–4 sets each in a 6–15 rep range, and progress the load over time. Pair primary lifts with assisting movements for complete development.
Open the muscle planner →Hamstrings FAQ
What are the best exercises for the Hamstrings?
Band Deadlift, Band Standing Leg Curl, Barbell Deadlift and Barbell Good Morning are among the most effective hamstrings exercises. Pair a heavy compound movement with one or two assistance exercises to train the hamstrings through its full range.
How often should you train the Hamstrings?
Training the hamstrings two to three times per week, with roughly 10–20 hard sets in total, works well for most lifters. Leave about 48 hours between demanding hamstrings sessions so the muscle can recover and grow.
Related muscles
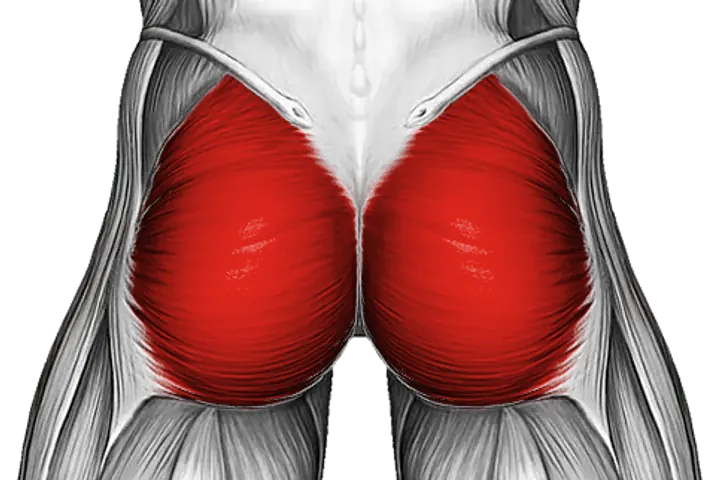
Glutes
Hip extension and abduction from thrusts, bridges and squats.
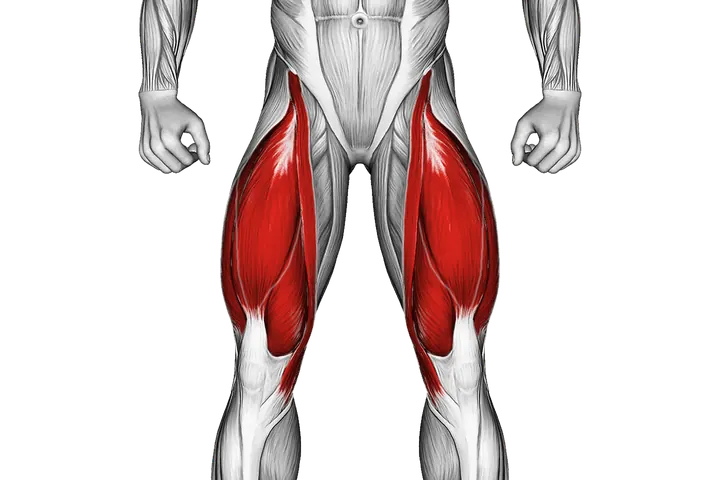
Quadriceps
Knee extension and squat-dominant leg work.
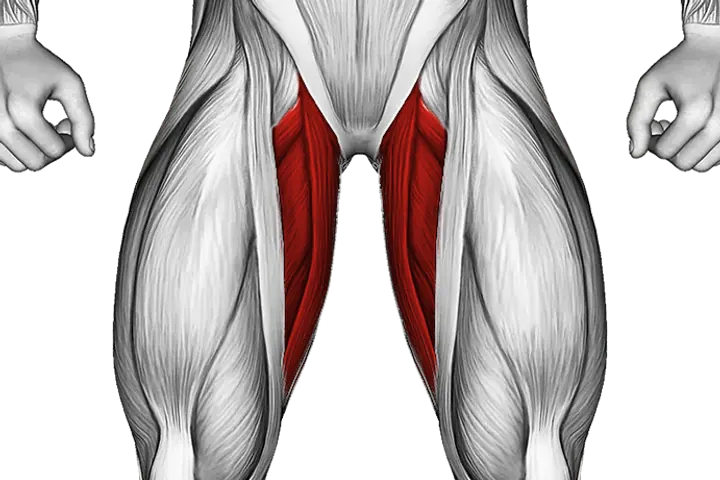
Adductors
Inner thigh work from adduction, wide squats and lateral lunges.
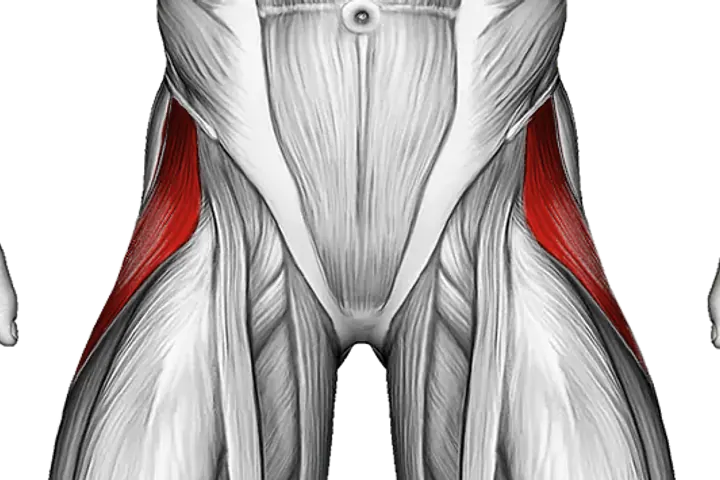
Abductors
Outer hip — abduction work for hip stability and a balanced lower body.
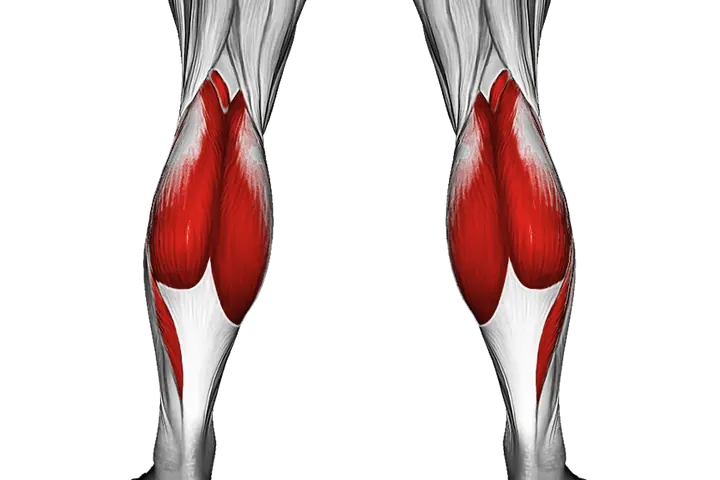
Calves
Ankle extension and lower-leg stability.
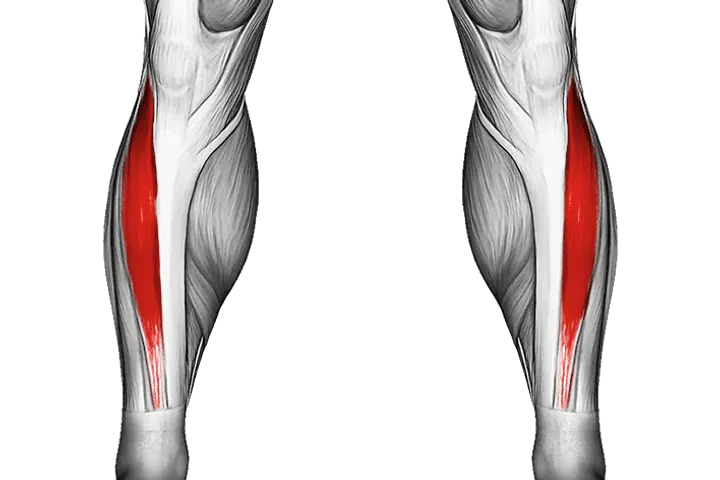
Tibialis
Front shin — dorsiflexion work for knee health and balanced lower legs.